
Hanging leg raises are a great exercise to build functional core stability and open up a lot more possibilities for advanced bodyweight movement. Furthermore, this move can be performed with minimal equipment. All you need is something to grip and hang from.
In this article we will explore how to do hanging leg raises with proper form in 5 steps, resulting in a satisfying exercise while building impressive core strength with maximum results.
Key Takeaways:
- You can progress to full hanging leg raises by following the 5 stages in this guide
- Hanging leg raises are an effective exercise to have in your “go-to” routine
- The hanging leg raise is a perfect exercise to help increase core stability for any fitness level
What are hanging leg raises?
When you perform a hanging leg raise correctly, you hang from a bar in an active hang position with straight legs and arms. Raise both legs to eye height and pause. Lower your legs back down to complete the exercise.
Hanging leg raises are an advanced bodyweight movement. Check out the guides below for more tips to achieve bodyweight mastery.
Related Posts:
- How To Do A Back Bridge In 5 Simple Steps
- Check out these 5 Minimalist Bodyweight Workouts
- The Best Exercises For Weight Loss At Home
- Dan John Easy Strength | A Minimalist Bodyweight Workout
- 4 tips to do Perfect Pull-ups + A Full Video Tutorial
- One Arm Pushup Progression In 7 Simple Steps
- Master The Pistol Squat Progression In 7 Steps
What muscles do hanging leg raises work?
Hanging leg raises are a great way to develop strong core muscles. The motion of lifting your legs up and down engages the anterior chain and abdominal muscles, including the transverse abdominis, rectus abdominis, and obliques.
Additionally, hanging leg raises help to stretch out your hip flexors, which are a group of muscles that run from the top of your thigh bone up to your lower back. They are responsible for pulling your knee upward toward your waist and aid in bending at the hips during everyday activities. By working your hip flexor muscles, you can help stabilise your pelvis and hips.
What are the benefits of hanging leg raises?
Now that you know what hanging leg raises are, you might be asking, “Why are hanging leg raises such an effective exercise?”.
Hanging leg raises have multiple benefits. First, they increase your anterior chain (chest, abdomen, pelvis) stability and compression, which helps with your balance and postural control. This is particularly important because the stability of your trunk is the basis of all functional movements.
They improve your shoulder stability and mobility. The position of the hanging leg raise allows your shoulders to stretch and strengthen, especially if you spend most of your day with your arms at a keyboard, a steering wheel, or using your phone.
Finally, if you find you have a tight lower back or hamstrings, hanging leg raises can help improve your range of motion in your posterior chain (the muscles on the backside of your body).
Hanging leg raises for beginners
Rarely do beginners jump straight into a full hanging leg raise on day one, we must build up through 5 stages. If you find you have movement restrictions, you can use this trigger point series to help improve your mobility before practising your hanging leg raise exercises.
To do a hanging leg raise without swinging, build up your movements and focus first on the fundamental beginning elements. Ensuring you work on compression of your anterior chain will significantly improve your chance of reaching full hanging leg raises.
Progress through the five steps below to nail strict hanging leg raises. These exercises also make great alternatives to hanging leg raises if you don’t have a bar available or if you want to switch up your exercise routine.
Achieve hanging leg raises in 5 steps
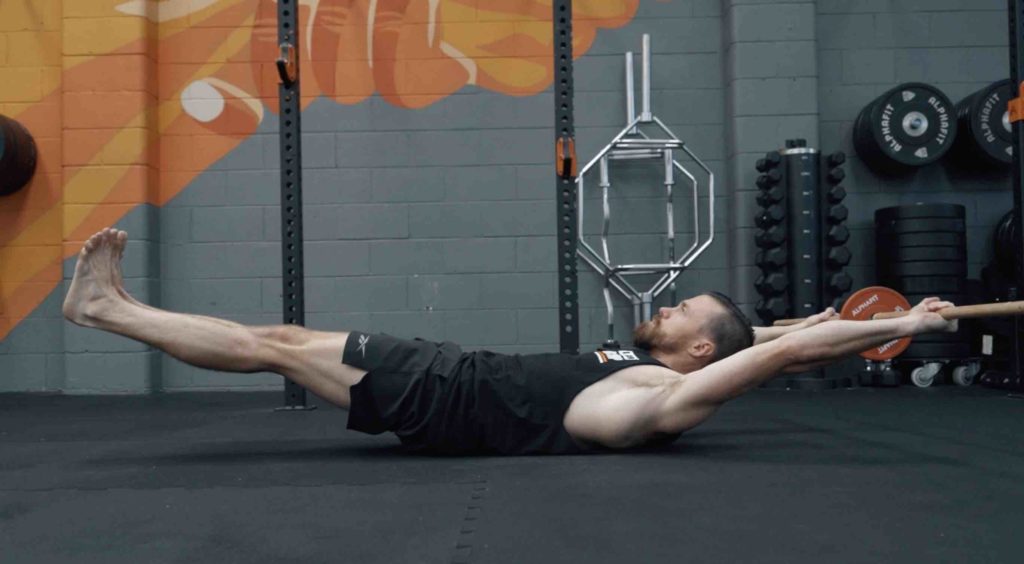
Step 1: Lying Leg Raise (2 sets, 15 reps each)
Start by lying on the floor on your back with your legs straight and raised. Next, push your lower back into the floor and lower your legs to the point before your back peels up off the floor. Finally, return to the start position.
Focus on completing this exercise slowly and with control. For example, tucking your chin into your chest may help you lower your legs in a more controlled manner.
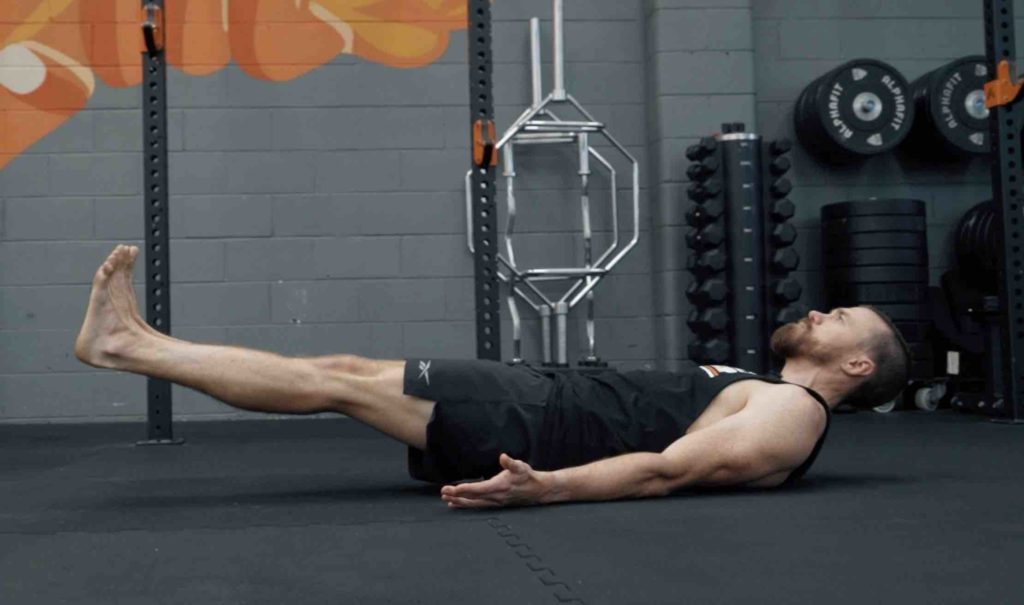
Step 2: Back Bodyline Drill (3 sets, 10 reps each)
The back bodyline drill is helpful because it trains the lower and upper body in the open-close motion needed to perform a hanging leg raise.
Grab a stick and start lying on the floor on your back with your legs straight and raised. Raise your arms and hold the stick or bar between both hands. Your legs should be close to meeting the stick. This is the close position.
Open by lowering your legs to the point before your back peels up off the floor. At the same time, lower your arms so that they are above your head. Then, return to the close position.
Remember to push your lower back into the floor, lock your knees, point your toes, and squeeze your quads and groin.
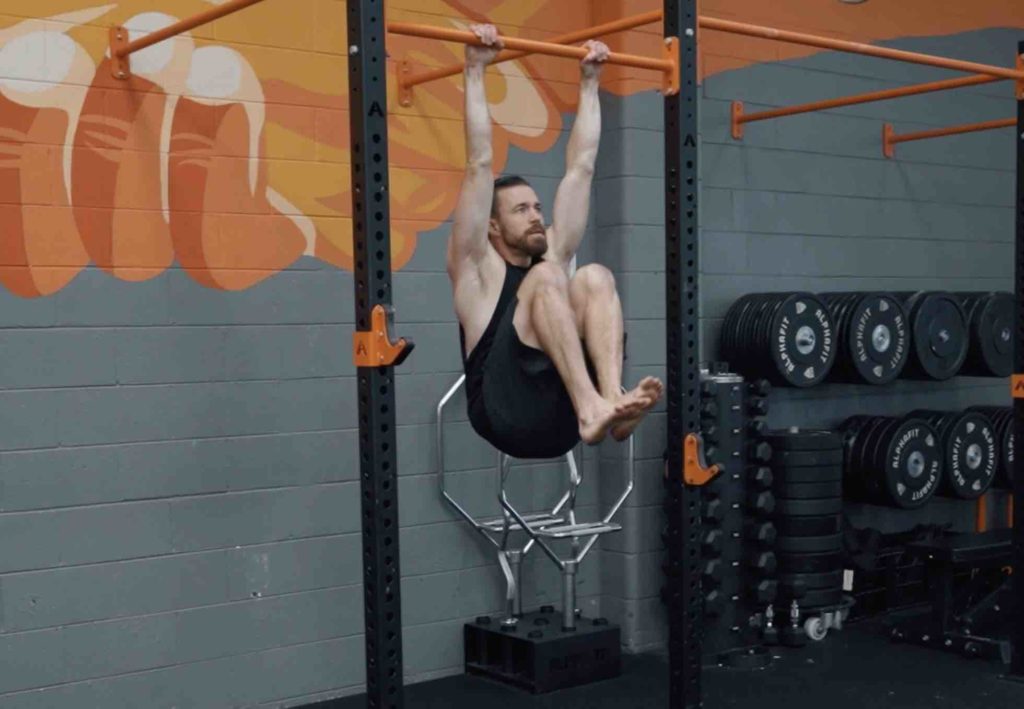
Step 3: Hanging Knee Raise (3 sets, 10 reps each)
Start in a hang position. Raise both knees towards your chest, parallel to the floor or higher and pause. Lower down your knees and repeat. Do these slow and controlled and focus on your abdominal compression. Try to work at a tempo of about three to five seconds per knee raise.
Step 4: Bent Leg Raise (3 sets, 5 reps each)
Start in a hang position. Then, keeping your legs together, bend your legs slightly and raise them so that your feet are in line with your head. Then, lower your legs back down. Keep the tempo around three to five seconds per raise.
You can try each leg separately to see whether there is a weakness in either side to improve the overall movement and fix any asymmetries you may have.
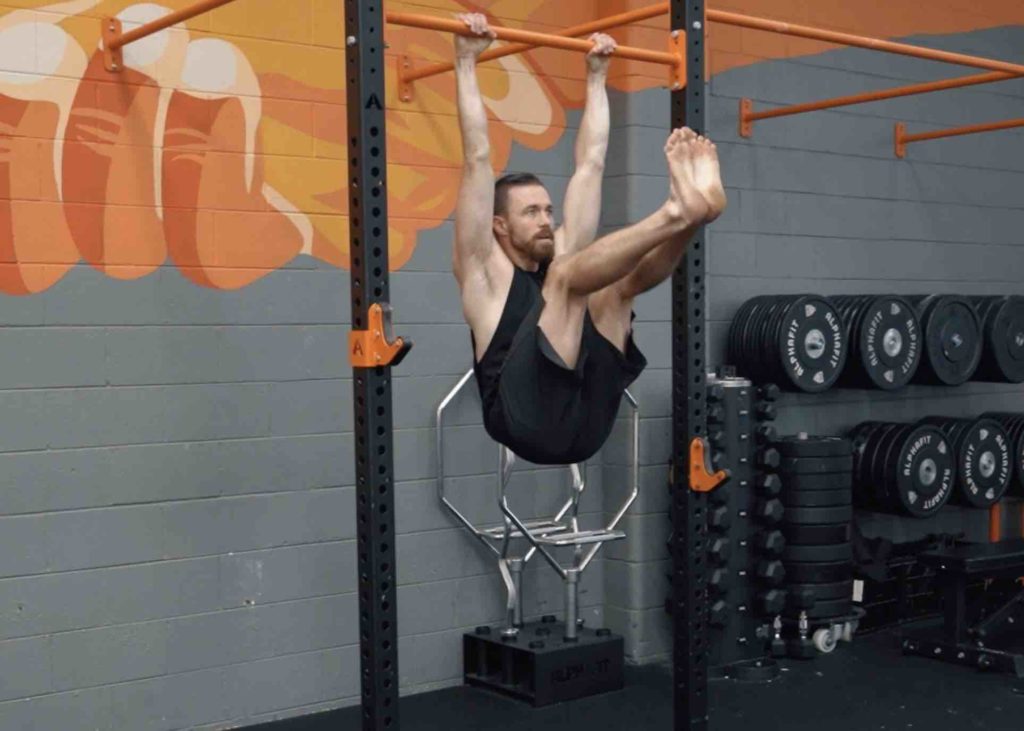
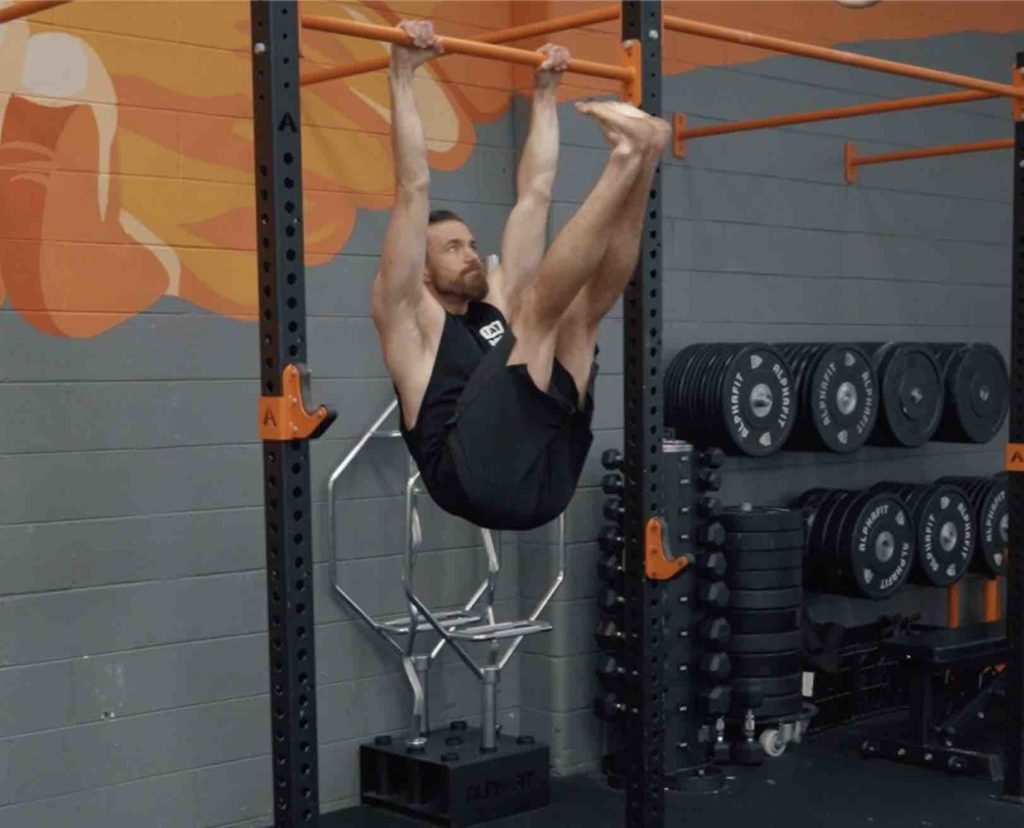
Step 5: Full Hanging Leg Raise
Start in an active hang position and straight legs. Next, raise both legs so that your feet are at eye height. Next, lower your legs back down. Squeeze your glutes, abs and groin throughout the movement and focus on compression.
Avoid excessive swinging during the movement. If you need to swing to perform the move, repeat the exercises in Steps 1 to 4 to ensure you have an excellent foundation to master the hanging leg raise completely.
Using a strict CrossFit or gymnast “toes to bar “version, you can take this movement one step further. Complete a full hanging leg raise; however, instead of raising your legs so that your feet are at eye height, raise your legs so that your feet are as close to the bar as possible.